Git is a famous open-source distributed version control mechanism. It efficiently handles everything code-related, from minor to very large-scale projects. Git allows developers to host their code on sites like Github, BitBucket, and Gitlab. It makes code management tasks like reverting to previous versions and branching easier. This version control mechanism can handle various projects promptly and effectively. It is notable since it is user-friendly and straightforward to comprehend.
Git is simple to understand and learn, with a small footprint and lightning-fast speed performance. It outperforms SCM systems such as Subversion, CVS, Perforce, and ClearCase by providing complex features such as low-cost local branching, convenient staging areas, and numerous operations.
This tutorial guide will show you how to install Git on the Debian 11 bullseye distribution. Git can be installed in two ways. You can install Git from Debian repositories using the APT package manager, or you can install straight from the source, which will offer you the most recent version.
Installing Git on Debian 11
Follow the steps provided herein to install Git on your Debian 11.
Method 1: Installing Git from Debian repositories using the APT package manager
Step 1: Before we begin installing software, we must ensure that your system is updated by running the subsequent apt commands in the terminal:
sudo apt update

sudo apt upgrade
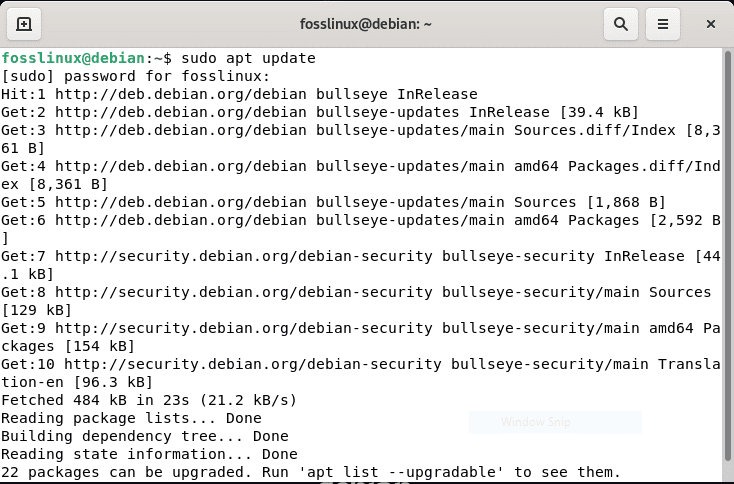
Debian update
Step 2: Once all Debian repositories have been updated, run the following command to install Git on Debian 11:
sudo apt install git
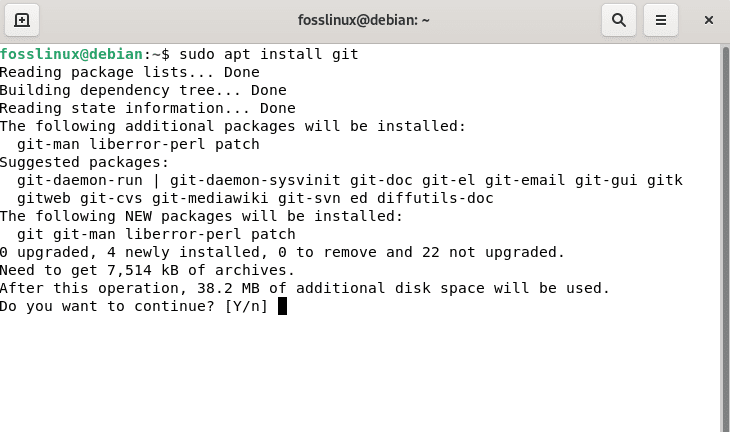
Debian install git
Step 3: Once the Git setup is complete, use the following command to determine the Git version:
git --version

Git version
Congratulations! Git has been successfully installed.
Don’t freak out if this method does not do the trick for you. Try out method 2 below.
Method 2: Installing Git directly from the source
Installing Git from the source is the superior and more versatile option. This may be a longer route, but it will provide you with the most recent version of Git. Install all Git dependencies to start by running the lines of code below:
sudo apt-get update

sudo apt-get install make libssl-dev libghc-zlib-dev libcurl4-gnutls-dev libexpat1-dev gettext unzip
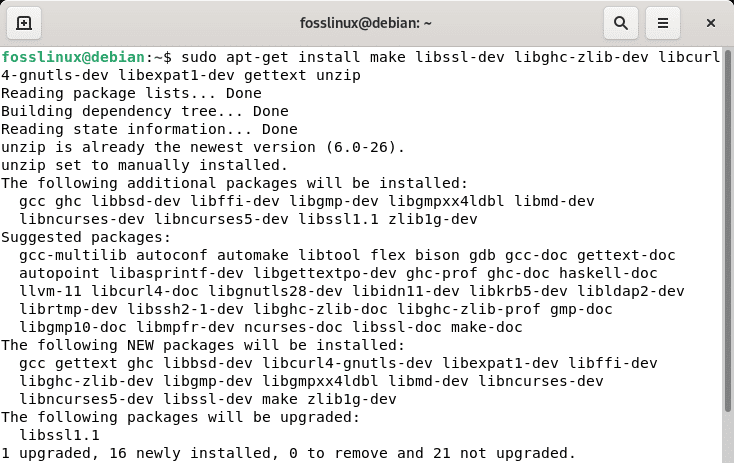
Git dependencies
After the installation is finished, navigate to the Git project hosted on Github.
https://github.com/git/git
Click the ‘Master’ branch, followed by ‘Tags.’ Here, you can select the latest version of Git. It is advised that you never choose the unstable release candidate version ‘RC’ for installation in the beta version.
Now, click ‘Code’ and copy the link to ‘Download ZIP.’
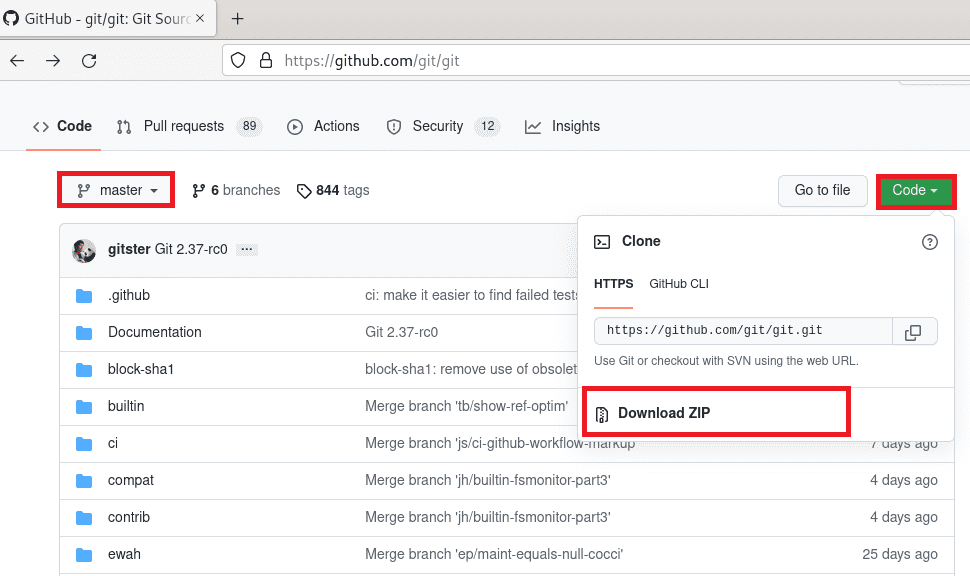
Download .zip file
Open the terminal on a Debian 11 system and use the wget command to download the Git ZIP file.
wget https://github.com/git/git/archive/refs/heads/master.zip
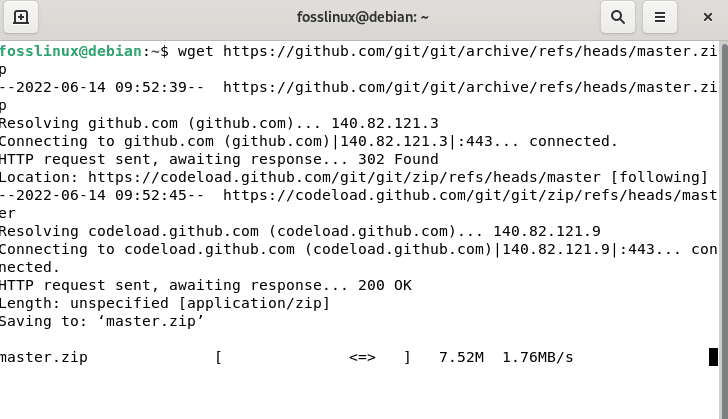
Download using terminal
Unpack the Git archive and navigate to this directory.
unzip master.zip

cd git-master

cd git-master
Now, to install the version control system from the source, execute the following lines of code:
sudo make prefix=/usr/local all

sudo make prefix=/usr/local install
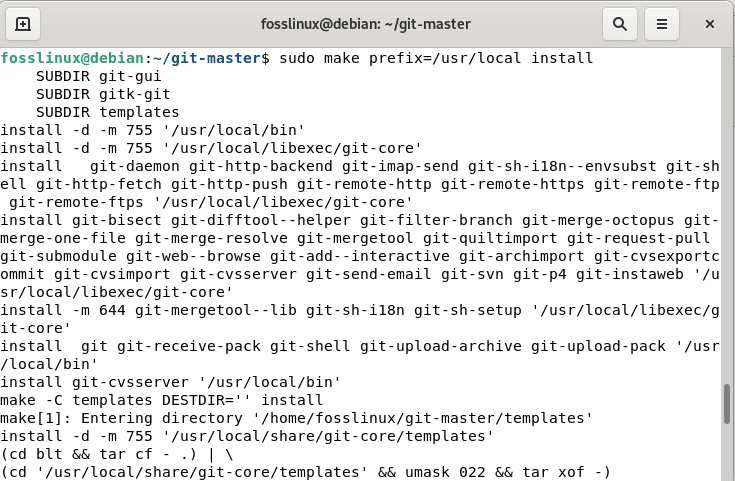
Make Install
Check the version of Git. Now, the most recent version of Git will be installed on your system.
git –version

Debian git version
Configure Git
After installation, you will need to configure common settings such as names and emails, primarily concerning git commit messages. As the following tutorial will explain, this is a reasonably simple task.
git config --global user.name "fosslinux"

git config --global user.email "fosslinux@gmail.com"

Configure git
You can verify the modifications with the command:
git config --list

Git config list
Congratulations! Git has been successfully installed on your Debian 11 OS.
Conclusion
We illustrated how to install Git on a system running Debian 11 operating system. Now, you can use Git to host your code on GitHub or any other platform supported by Git. This detailed article illustrated the two methods one can use to install Git. If one way fails, you can try the other alternative. As a best practice, developers should have their local copy of the source code repository. This allows them to work on it without impeding the progress of the rest of their project. Thanks for reading!

