In my Linux usage, I’ve had my fair share of “Oh no!” moments, usually following a less-than-ideal system update or tinkering gone wrong. It’s precisely these moments that make me appreciate tools like TimeShift. For those of you who aren’t familiar, TimeShift is akin to a time machine for Linux, allowing you to take snapshots of your system at various points in time.
These snapshots can then be used to restore your system to a previous state, should you run into any issues. Today, I’ll guide you through installing and using TimeShift on Fedora, highlighting some features I personally love (and some I’m not too fond of).
Why TimeShift?
Before diving into the nitty-gritty, let’s talk about why TimeShift might just become your new best friend (it certainly is mine). Its most notable features include:
- Incremental backups: Only the changes made since the last snapshot are saved, which means it’s efficient with your system’s resources.
- System restore: You can restore your system to any previous state captured in a snapshot. This is invaluable after a problematic system update.
- Scheduled snapshots: You can set TimeShift to automatically take snapshots daily, weekly, etc., ensuring you always have a recent backup.
- User exclusion: TimeShift primarily focuses on system files and settings, excluding user files (like documents, pictures, etc.) by default, though this can be customized.
Installing TimeShift on Fedora
Fedora doesn’t come with TimeShift pre-installed, but installing it is a straightforward process. Here’s how you can do it using the command line, which is my preferred method for its speed and simplicity:
- Open your terminal: You can do this by searching for “Terminal” in your applications menu or by pressing
Ctrl + Alt + T. - Install TimeShift: Once the repository is added, you can install TimeShift by running the below command. Pay attention to the terminal and enter ‘Y’ when needed.
sudo dnf install timeshift
- (Optional – Use only if #2 didn’t work) Add the RPM Fusion repository: TimeShift is available in the RPM Fusion repository, which we need to add to our system. Execute the following commands:
sudo dnf install https://download1.rpmfusion.org/free/fedora/rpmfusion-free-release-$(rpm -E %fedora).noarch.rpm

sudo dnf install https://download1.rpmfusion.org/nonfree/fedora/rpmfusion-nonfree-release-$(rpm -E %fedora).noarch.rpm
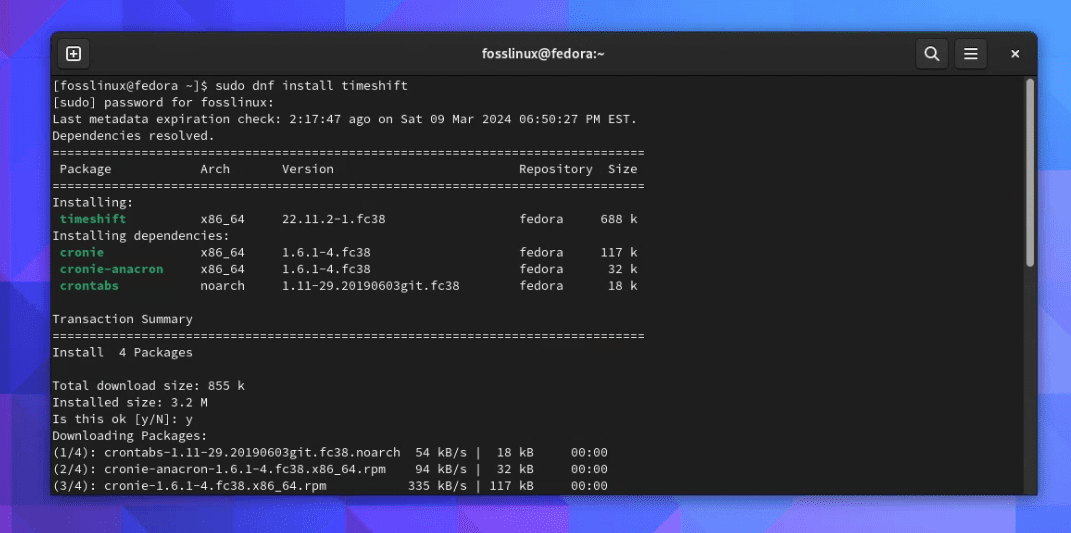
Installing TimeShift on Fedora 38
And voila! TimeShift should now be installed on your system.
Launching TimeShift
Here’s how to start using TimeShift to protect your system:
Launch TimeShift: You can find it by searching for it in your applications menu. OR Type timeshift in your terminal and press enter. If you see the TimeShift interface pop up, congratulations, you’ve successfully installed TimeShift!
Setting up TimeShift: RSYNC/BTRFS
When setting up your snapshots, you’ll come across a pivotal choice regarding the snapshot type: RSYNC or BTRFS. This decision hinges on your system’s setup and your specific needs for flexibility and convenience. Let me break down what each option offers, helping you make an informed choice.
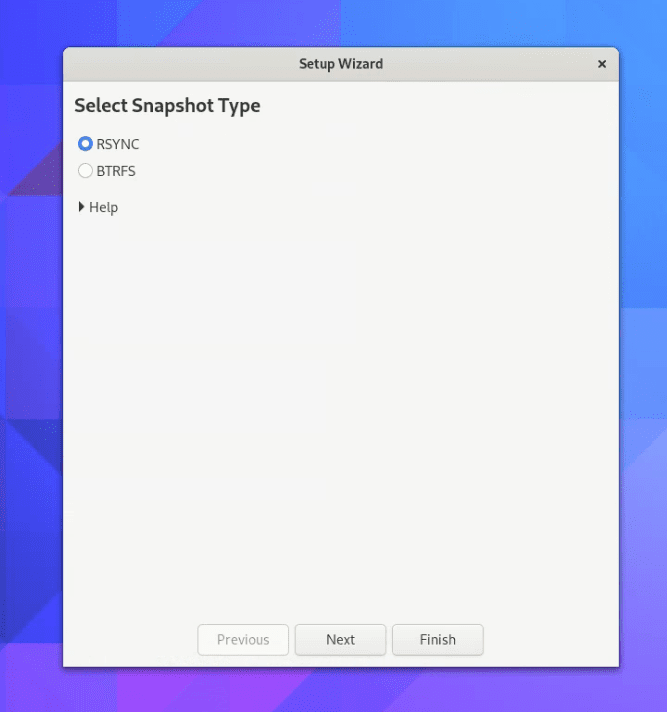
Configuring TimeShift on Fedora
RSYNC: The Flexible Powerhouse
RSYNC is a versatile option that works with nearly any filesystem. It’s your go-to if your system is not running on Btrfs. Here’s why you might lean towards RSYNC:
- Compatibility: RSYNC is compatible with most Linux filesystems, making it a universal solution.
- Flexibility: It offers significant control over what gets backed up and what doesn’t, allowing for customized backup solutions.
- Incremental backups: Like BTRFS, RSYNC supports incremental backups, meaning subsequent snapshots only save changes since the last backup, saving disk space.
BTRFS: Optimized for Btrfs Filesystems
If your system uses a Btrfs filesystem, you’re in for a treat. BTRFS snapshots take full advantage of the underlying features of the Btrfs filesystem, offering:
- Efficiency: BTRFS snapshots are incredibly fast and consume very little additional disk space because they utilize the filesystem’s ability to share unchanged data between snapshots.
- Seamless integration: Being designed for Btrfs, these snapshots work seamlessly, offering a more integrated experience with potentially fewer hiccups or compatibility issues.
Making the Choice
To check if your system uses a Btrfs filesystem, open a terminal and run:
df -Th | grep "^/"
This command lists your mounted filesystems.
[fosslinux@fedora ~]$ df -Th | grep "^/"
/dev/sda3 rsync 14G 13G 1.5G 90% /
/dev/sda3 rsync 14G 13G 1.5G 90% /home
/dev/sda2 ext4 974M 313M 594M 35% /boot
Look for your root (/) partition in the output. If the type is btrfs, then your system uses Btrfs. Otherwise, you’re likely using another filesystem type, such as ext4, which means RSYNC would be your choice for TimeShift snapshots. In the above example, my system uses RSYNC.
Configuring TimeShift
Upon opening TimeShift, you’ll be prompted to set up snapshot parameters. I recommend sticking with the default settings for most users.
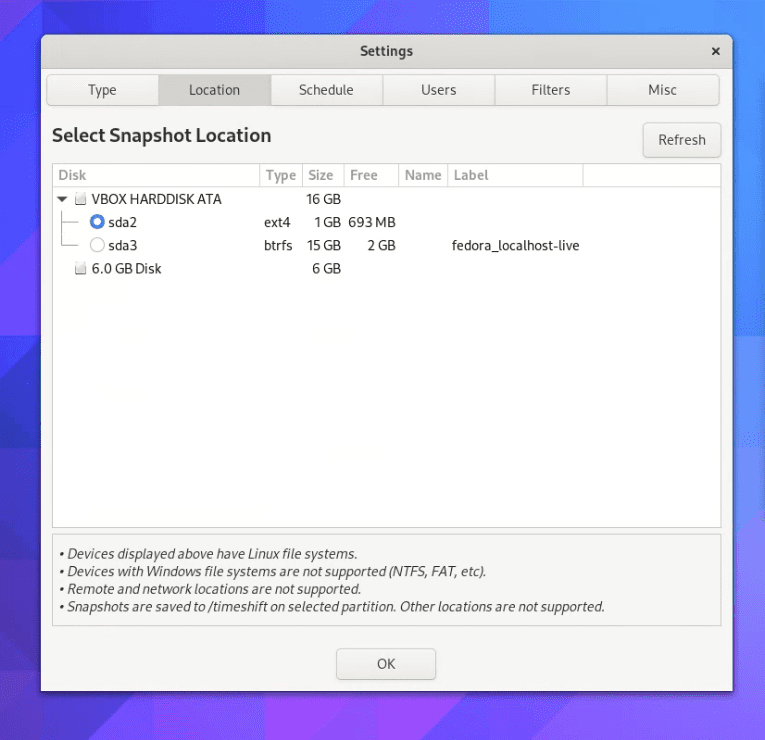
TimeShift Options
You can click on “Schedule” tab to select the snapshot frequency.
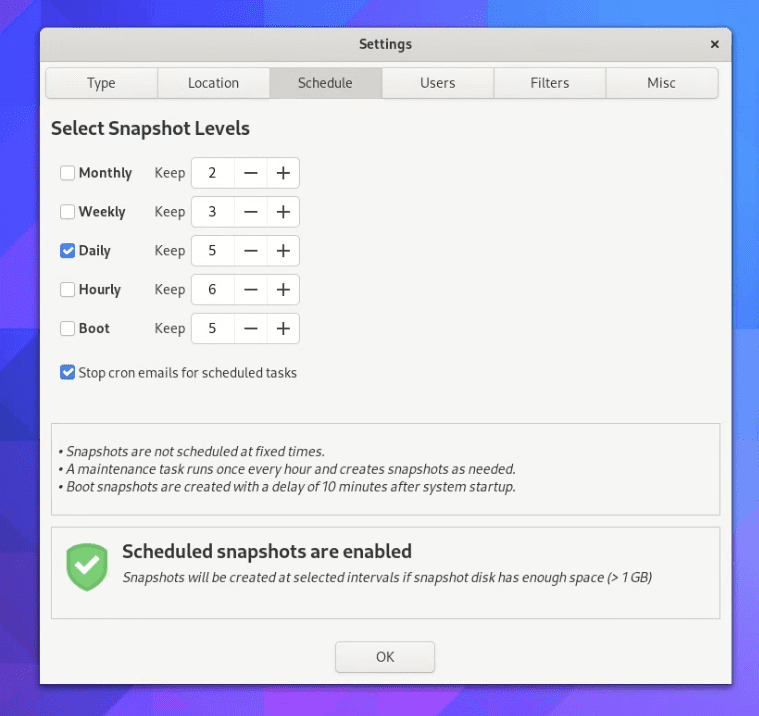
Scheduling options in TimeShift
Click on “Finish” to take your first snapshot.
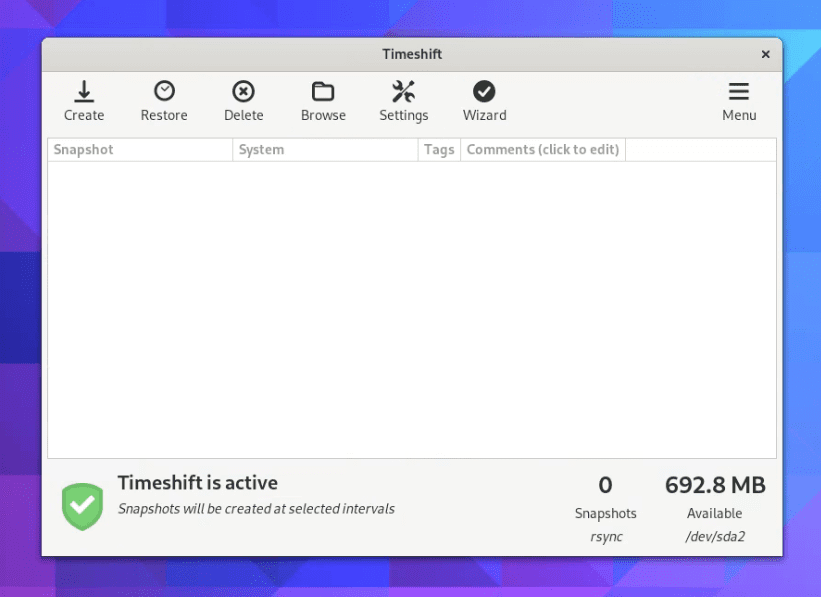
TimeShift Enabled
Restore a snapshot
Should things go south, open TimeShift, select the snapshot you wish to restore from the list, and click “Restore.” Follow the on-screen instructions to bring your system back to the selected state.
Uninstallation
If, for some reason, TimeShift isn’t for you, uninstalling it is as easy as its installation:
sudo dnf remove timeshift
My thoughts
While I’m a big user of TimeShift for its robust backup and restore capabilities, it’s not without its downsides. For one, the user interface feels a bit dated to me, and I’ve experienced occasional sluggishness when taking snapshots. However, these are minor gripes in the grand scheme of things, and the peace of mind it offers more than makes up for them.


